Building a Full Stack Web Messaging Application with Python, Docker, MongoDB, and Kubernetes


In this hands-on blog post, we’ll walk you through the development and deployment of a full-stack web-based messaging application. This application allows users to store, delete, and view messages in a secure and scalable environment. We’ll be utilizing Python for the backend, MongoDB for data storage, Docker for containerization, and Kubernetes for orchestration, with each component playing a crucial role in the architecture.
You can find the code for this project on my GitHub here. I also made a hands-on tutorial on YouTube, which you can watch here.
Project Overview
The goal of this project is to build a robust messaging application that can handle basic operations such as storing, deleting, and viewing messages. The application is fully deployed on a Kubernetes cluster, ensuring scalability, high availability, and ease of management. MongoDB is used as the database and runs in its own pod, ensuring that data storage is isolated and efficient.
Let’s dive into the following steps:
Step 1: Creating the Python Application
Here’s the Python code for app.py:
from flask import Flask, render_template, request, url_for, redirect
from bson.objectid import ObjectId
from pymongo import MongoClient
from urllib. parse import quote_plus
import variables

#Flask App Initialization
app = Flask(__name__, template_folder=’templates’)

# Create the mongodb client
uri= “mongodb://%s:%s@%s” % (quote_plus(variables.decodedUsername), quote_plus(variables.decodedPassword), ‘mongodb-service:27017’ )
client = MongoClient(uri)

# creating DB = messagesDB
db = client[‘messagesDB’]
messagesCollection = db.messagesCollection # creating a collection to store messages”

# Get and Post Route
@app.route(“/”, methods=(‘GET’, ‘POST’))
def index():
if request.method == “POST”:
message = request.form[‘message’]
messagesCollection.insert_one({‘message’: message})
return redirect(url_for(‘index’)) # redirect the user to home page
allMessages = messagesCollection.find()
return render_template(‘index.html’, messagesCollection = allMessages) # get all messages from messagesDB table

#Delete Message
@app.post(“/<id>/delete/”)
def delete(id):
messagesCollection.delete_one({“_id”:ObjectId(id)})
return redirect(url_for(‘index’)) # redirecting to index.html using python’s redirect method

#Running the App
if name == “__main__”:
app.run(host=”0.0.0.0",port=5000,debug=True)
Explanation:
#Flask App Initialization: Initializes the Flask app, specifying the templates folder.
# Create the mongodb client: Creates a connection string for MongoDB using credentials from variables.py, connecting to the service at mongodb-service:27017.
# creating DB = messagesDB: Accesses the messagesDB database and messagesCollection collection in MongoDB.
# Get and Post Route: GET: Retrieves all messages from MongoDB and renders them in index.html. POST: Accepts a new message from the form, inserts it into MongoDB, and redirects back to the home page.
#Delete Message: Deletes a message by its MongoDB _id and redirects back to the homepage.
#Running the App: Starts the Flask app on port 5000, accessible on all network interfaces, with debugging enabled.
Head to GitHub for complete source code including html and CSS used for UI.
Here’s the Python code for variables.py:
import base64

username = ‘YWRtaW4=’
password = ‘YWRtaW5wYXNzd29yZA==’
decodedUsername = base64.b64decode(username)
decodedPassword = base64.b64decode(password)
Explanation:
username and password are base64 encoded strings.
b64decode() decodes the base64 strings back into their original byte values:
Step 2: Writing requirements.txt
Here’s the code:
click==8.0.3
colorama==0.4.4
dnspython==2.7.0
Flask==2.0.2
itsdangerous==2.0.1
Jinja2==3.0.3
MarkupSafe==2.0.1
pymongo==4.11
Werkzeug==2.0.2
This installs the Python dependencies specified in the requirements.txt file. This allows you to install any libraries that your Python application needs to run.
Run command: “pip freeze > requirements.txt” to freeze all dependencies and redirect them to a file
Step 3: Writing a Dockerfile
Now, we need to containerize our Python application using Docker. A Dockerfile defines the steps required to build a Docker image for our app.
Here’s the Dockerfile for the app:
FROM python:3.10.0-alpine3.15
WORKDIR /app
COPY requirements.txt .
RUN pip install -r requirements.txt
COPY src src
EXPOSE 5000
ENTRYPOINT [“python”, “./src/app.py”]
Explanation:
FROM python:3.10.0-alpine3.15 : We start with a Python image
WORKDIR /code: This sets the working directory inside the container.
3. COPY requirements.txt requirements.txt : This copies the requirements.txt file from the host machine (the machine where you’re building the Docker image) into the container at the path /code/requirements.txt.
4. RUN pip install -r requirements.txt : This installs the Python dependencies specified in the requirements.txt file using pip. This allows you to install any libraries that your Python application needs to run.
5. EXPOSE 5000: Exposes port 5000 so the app can be accessed externally.
6. CMD [“python”, “./src/app.py”] : This sets the default command that will be run when the container is started. In this case, it will run python app.py, which means it will start the Python application by executing main.py.
Step 4: Building a Docker Image
With the Dockerfile ready, we can now build the Docker image. To do this, follow these steps:
First, make sure you have Docker installed on your machine.
Navigate to the project directory (where Dockerfile and main.py are located).
Run the following command to build the Docker image:
docker build -t msg:3.0.50 .
The -t flag assigns a tag (name) to the image. Here, we’ve tagged it as msg:3.0.50
The . at the end tells Docker to use the current directory as the build context.
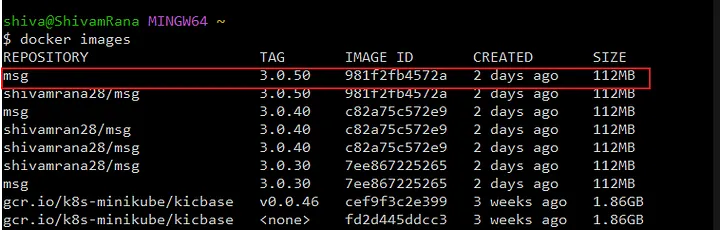
Once the image is built, you can verify it by running
docker images
You should see msg:3.0.50 listed.
Step 5: Deploying the Docker Image to Kubernetes
Next, we’ll deploy the Docker image to a Kubernetes cluster. For this tutorial, we’ll use a Ingress to make the app accessible externally on a custom url i.e. msgapp.com
Prerequisites:
- A running Kubernetes cluster (minikube).
Steps:
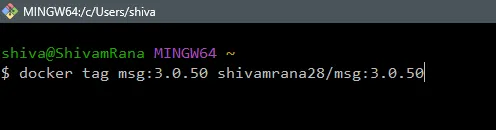
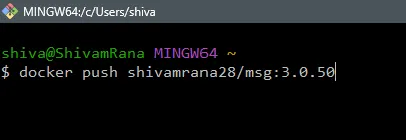
- Push the Docker image to a registry: Before deploying the image to Kubernetes, you need to push the Docker image to a container registry (like Docker Hub, Google Container Registry, or others). For Docker Hub, you can do the following:
docker tag msg:3.0.50 yourusername/msg:3.0.50
docker push yourusername/msg:3.0.50
2. Create a Kubernetes mongoDB Deployment:
Here’s the contents of deployment and the mongodb service for the deployment.
name of deployment= mongodb
image = mongo:latest
Contents mongo-depl.yaml
# mongo-deployment.yaml

apiVersion: apps/v1
kind: Deployment
metadata:
  name: mongodb
spec:
  replicas: 1
  selector:
    matchLabels:
      app: mongodb
  template:
    metadata:
      labels:
        app: mongodb
    spec:
      containers:
        - name: mongodb
          image: mongo:latest
          ports:
            - containerPort: 27017
          env:
          - name: MONGO_INITDB_ROOT_USERNAME
            valueFrom:
              secretKeyRef:
                name: mongodb-secret
                key: username
          - name: MONGO_INITDB_ROOT_PASSWORD
            valueFrom:
              secretKeyRef:
                name: mongodb-secret
                key: password
          - name: ME_CONFIG_MONGODB_ENABLE_ADMIN
            value: "false"
---
apiVersion: v1
kind: Service
metadata:
  name: mongodb-service
spec:
  selector:
    app: mongodb
  ports:
    - port: 27017
      targetPort: 27017
      protocol: TCP
3. Create a secret mongoDB Deployment:
Here’s the contents of deployment and the mongodb service for the deployment.
- name of deployment= mongodb-secret
Contents of mongodb-secret.yaml
apiVersion: v1
kind: Secret
metadata:
  name: mongodb-secret
  namespace: msg
type: Opaque
data:
  username: YWRtaW4=
  password: YWRtaW5wYXNzd29yZA==
Create namesapce "msg": Run below command to create namespace=msg to deploy all resources and switch to msg namespace
kubectl create ns msg
kubectl config set-context --current --namespace=msg
Apply the files: Remember to apply the mongodb secret first then apply the mongodb deployment.
Kubectl apply -f mongodb-secret.yaml
kubectl apply -f mongo-depl.yaml
Create a Kubernetes Pod:
Below are the contents of pod and the service created for the pod.
Contents of msg-pod.yaml
name of pod = msg-pod
image = shivamrana28/msg:3.0.50
apiVersion: v1
kind: Pod
metadata:
  creationTimestamp: null
  labels:
    run: msg-pod
  name: msg-pod
spec:
  containers:
  - image: shivamrana28/msg:3.0.50
    name: msg-pod
    ports:
    - containerPort: 5000
    env:
      - name: MONGO_HOST
        value: "mongodb-service"
      - name: MONGO_PORT
        value: "27017"
      - name: ME_CONFIG_MONGODB_ADMINUSERNAME
        valueFrom:
          secretKeyRef:
            name: mongodb-secret
            key: username
      - name: ME_CONFIG_MONGODB_ADMINPASSWORD
        valueFrom:
          secretKeyRef:
            name: mongodb-secret
            key: password
      - name: ME_CONFIG_MONGODB_SERVER
        valueFrom:
          configMapKeyRef:
            name: mongodb-configmap
            key: database_url
---
apiVersion: v1
kind: Service
metadata:
  name: msg-svc
spec:
  type: ClusterIP
  selector:
    run : msg-pod
  ports:
  - port: 5000
    targetPort: 5000
Create ConfigMap for msg-pod:
Here's the contents of mongo-configMap.yaml
apiVersion: v1
kind: ConfigMap
metadata:
  name: mongodb-configmap
data:
  database_url: mongodb-service
Apply the files: Remember to apply the mongo-configMap.yaml first then apply the msg-pod.yaml.
Kubectl apply -f mongo-configMap.yaml
kubectl apply -f msg-pod.yaml
Create ingress for our application msg-app pod:
Below are the contents of ingress.yaml
In below ingress, our host = msgapp.com will forward the request to the service (msg-svc) which was created for pod = msg-pod
apiVersion: networking.k8s.io/v1
kind: Ingress
metadata:
  name: msgapp-ingress
  namespace: msg
  annotations:
    nginx.ingress.kubernetes.io/rewrite-target: /
spec:
  rules:
  - host: msgapp.com
    http:
      paths:
      - pathType: Prefix
        path: /
        backend:
          service:
            name: msg-svc
            port:
              number: 5000
Apply ingress.yaml:
Kubectl apply -f ingress.yaml
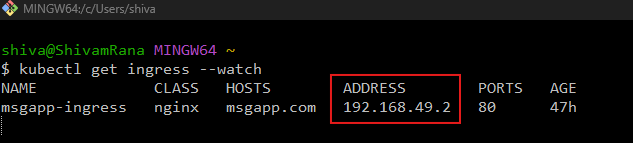
Run below command to get ingress status and wait for the Ip address to be assigned.
kubectl get ingress --watch
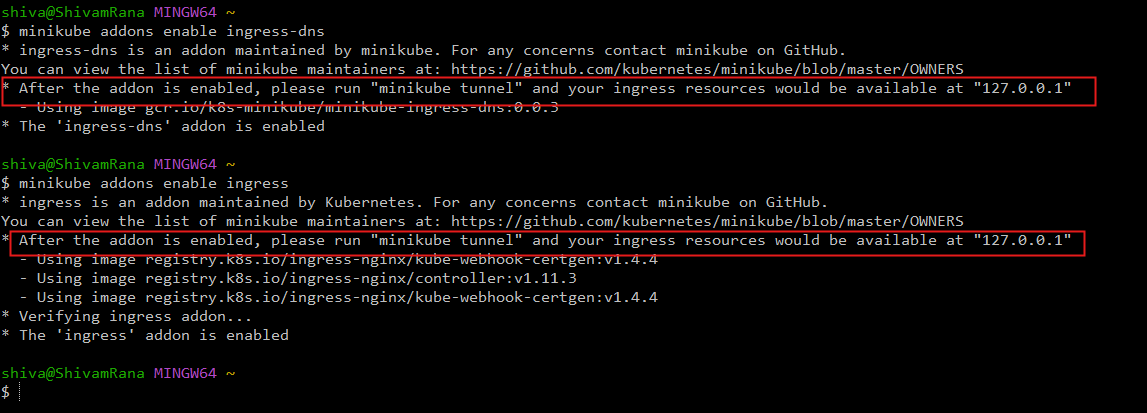
Run below commands to enable ingress on minikube.
kubectl addons enable ingress
kubectl addons enable ingress-dns
REMEMBER TO NOTE THE IP ADDRESS ON WHICH MINIKUBE TUNNEL WILL BE AVAILABLE AS HIGHLIGHTED BELOW. IN MY CASR IT IS 127.0.0.1******
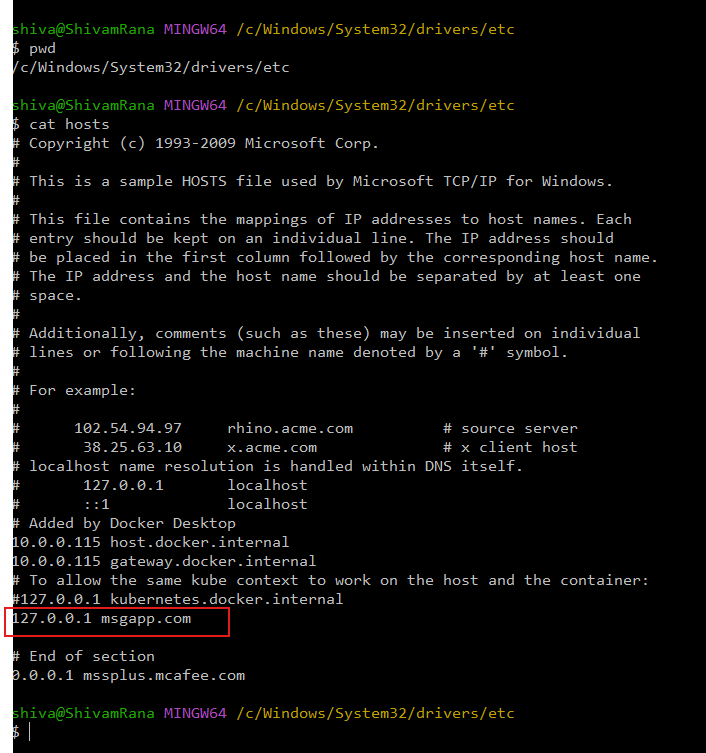
If you are on Windows 10/11, goto etc/hosts files and add below entry to our host defined in ingress.yaml.
On windows machine things work little differently. Our ingress was assigned an IP Address of 192.168.49.2, but our application will not be accessible on this IP. Instead application will be accessible on the ip which is shown after ingress was enabled on minikube.
However, on MacOs, the application will be accessible on IP Address of 192.168.49.2 once this IP is mapped to the host(masapp.com) in etc/hosts file.
Run command "minikube tunnel" in git bash.
It will start the tunnel for the ingress msgapp-ingress as seen below.
Starting tunnel for service msgapp-ingress.

Access the Application:
in the browser, type msgapp.com and enjoy the application.

Conclusion
In this blog, we developed a full-stack web-based messaging application using Python, Docker, MongoDB, and Kubernetes. Docker enabled containerization, ensuring consistent environments across development and production, while Kubernetes orchestrated the containers, providing automatic scaling, load balancing, and fault tolerance.
This allowed us to build a scalable and highly available messaging platform capable of handling increased user traffic without downtime. MongoDB was chosen as the backend data storage solution due to its flexibility, scalability, and ability to handle large amounts of data efficiently. Together, these technologies created a robust and maintainable system suitable for modern web applications.
For those of you who want to dive deeper into the code, you can explore my GitHub repository here. Additionally, I've created a hands-on tutorial on YouTube that walks you through the entire process—check it out here. Happy coding, and feel free to leave any questions or feedback!
I really appreciate you following along with this tutorial! 🙏😊 I hope you found it informative and that it clarified the process of deploying Python applications to Kubernetes. 🐍🚀 You should now feel empowered and ready to deploy your own apps with confidence! 💪💻 My goal is that this experience has not only increased your confidence 💡 but also sparked your curiosity to explore containerization and cloud-native development further! 🌐🔧 Keep coding and experimenting—there’s always more to learn! 🎉🎨
Liked what you read here? Don’t stop now! Head over to my portfolio website at www.itissr.com—think of it as my blog, but packed with even more amazing content. Also, feel free to connect with me on LinkedIn at https://www.linkedin.com/in/shivam-rana-873a3b99/ for the latest updates and insights. Your next favorite read (and perhaps a laugh or two) is just a click away! 😄🚀